|
Bruce's
Interests - Projects
Here is some information on the
projects that have kept him busy around the house in recent years. Read on for more.
This Web Site
You are looking at of his projects. He likes doing basic web
sites. Being an engineer, he is more into function than glamour, so
this explains its "Spartan" appearance. If he ever gets the time,
he
will develop some graphics capabilities along with some better site
development skills, and his sites will be a bit more stylish. Back to the top
Garden Room
When we originally bought the house, it had a covered porch in back.
While it was nice, Betsy wanted something a little nicer. He closed
in the open side and installed casement windows. He then had the
doors moved from the original exterior wall of the house to the new
wall.
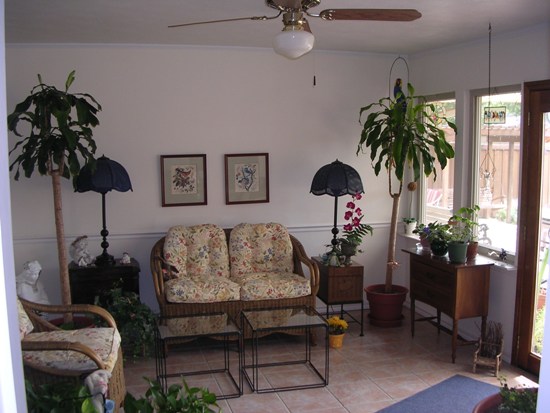
The walls were finished, a tile floor was put down over the original
concrete floor and the results are seen above. This space makes for
an excellent area for indoor plants as well as a peaceful place to
sit and relax. Back to the top
Deck Rebuild 1
Bruce rebuilt the deck behind the house several years ago before he
had a digital camera, so he doesn't have any digital photos. At the
time, he squared off the original "L-shaped" design, made a concrete
vault and sunk the hot tub. He also installed drain pipe underneath
the deck so rain water from the gutters could be put back into the
soil. He
hasn't scanned any photos of it yet, but once he does, this section
will be updated. Back to the top
Arbors
Since moving in back in 1997, we have done a lot of yard work. This
includes a couple of arbors and a copper garden arch.
The first arbor built was out of necessity. The bay window in the
kitchen had a west exposure and got direct sun in the afternoons.
This is not a good situation in the summer in Texas.
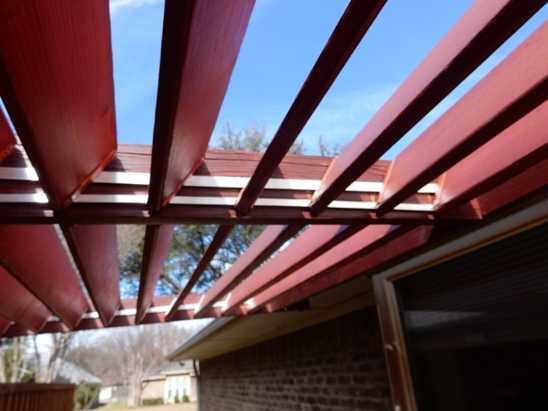
This arbor is essentially a 6' x 10' plantation shutter made of 2 x
6 treated lumber and deck planks. The deck planks were "louvered" so they can be
adjusted to control the time and amount of light hitting the window
and flower beds below.
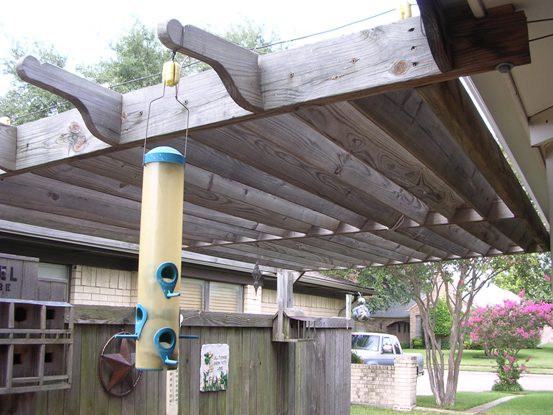
The kitchen table is at the bay window, so bird feeders were hung
off the arbor to attract our fine feathered friends. The
insulators are for a live-stock electric fence charger used to keep
the squirrels out of the bird feeders.
The arbor lasted over 20 years. The deck planking used to make the
shutter slats and arms deteriorated and started falling apart. In
January,2021 after completing the west fence replacement, Bruce tore
the arbor down to the basic frame and replaced the slats and arms.
The photo below shows the frame receiving the first set of "shutters".
The restored arbor is shown below.
Close-up of the mounting and linkage system.
The second arbor was made to hold a yard swing. Not wanting "tacky"
big box store swing on the deck, he offered to build a formal swing
arbor back by his "grill area".
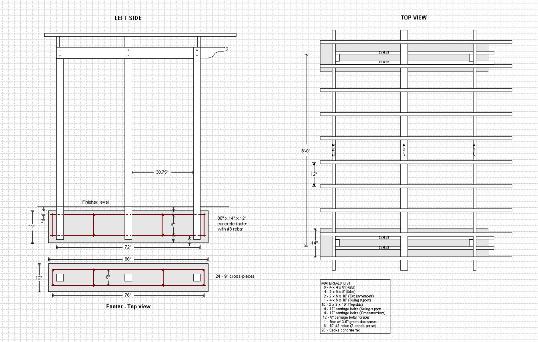
Being an engineer, he need a set of drawings and materials list to
get started.
This is a "shot" of the plan done to scale in Visio. The arbor is made out of 4 x 4 posts, 2 x 6
cross members and a 2 x 2 top covered in landscape screening. There
is a 4 x 6 main cross member in the center that supports the swing.
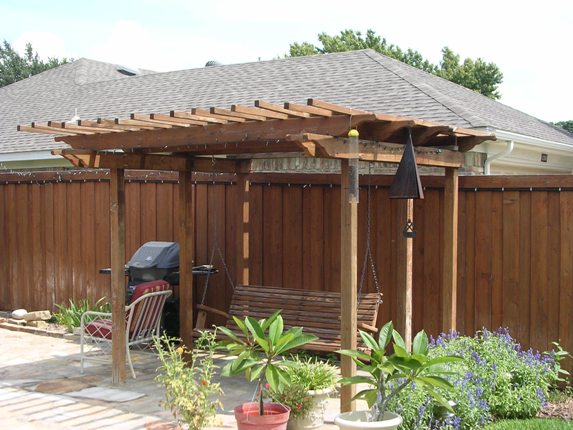
This is a photo of the finished arbor a few years after it was
completed.
Betsy was interested in garden arches, but everything we looked at was
expensive and cheaply made. For about 20% of the cost of a
ready-to-assemble low-grade steel arch, he was able to buy the copper
tubing
and fittings to make a really nice one.
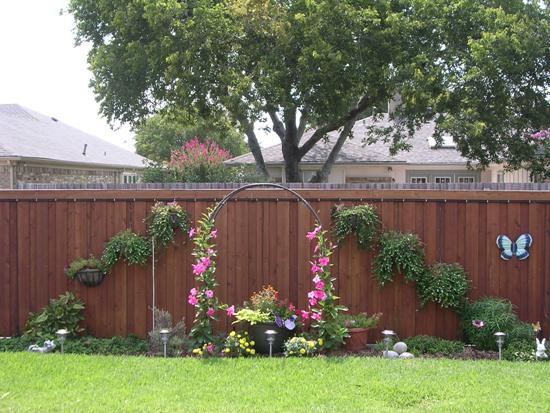
With a plan, measuring tape, hacksaw, torch and solder, he was able to
build this copper arch. Later in the summer, the Mandeville will cover
the arch completely.
Here is a shot of one of the joints after about 4 years in the
weather. Back to the top
Brick Mailbox
In April of 2008, he finally decided to do something with that pile
of bricks left over from some work we had done on the house. Never
having done a brick mailbox project before, he thought he would give
it a try. The results are seen below.
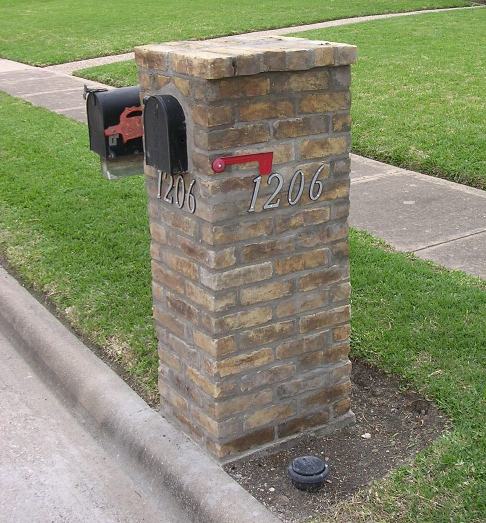
The base is a 4" concrete slab with a 7" diameter by 36" deep pier
to stabilize it. The pier has four pieces of rebar that fan out and
connect to the steel in the base. Two additional pieces of rebar run
all the way to the top of the structure. The brick shell is poured
solid with concrete so it should be able to survive a minor
collision with a vehicle without damage.
Back to the top
Radiant
Barrier & Insulation
Upgrade
In the winter of 2008-2009, he upgraded the attic insulation and
installed radiant barrier. The materials were really cheap, about
$0.30 per square foot, but it was a lot of work to install the
radiant barrier. Read
on for a summary of the process he used.
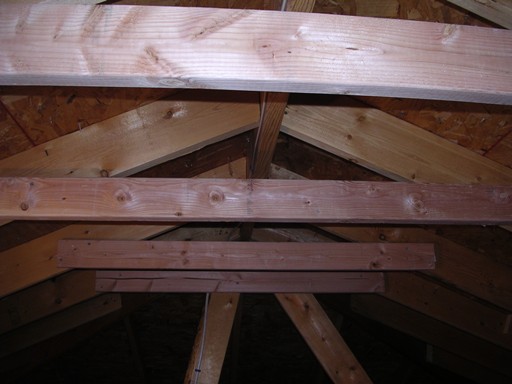
First, he installed cross-members for the flat-top chamber or plenum at the
ridge. This plenum is ventilated by thermostatically-controlled
power vents that pull air from the soffit vents up between the
barrier roof decking and exhaust it out the top of the roof. The
barrier material is perforated, so it also ventilates the attic
below the barrier.
Second, he raked back the blown-in insulation and placed R19 bats.
You can also see one of several 18" x 96" boards he used as work
platforms. These were cut from a sheet of 3/4" plywood.
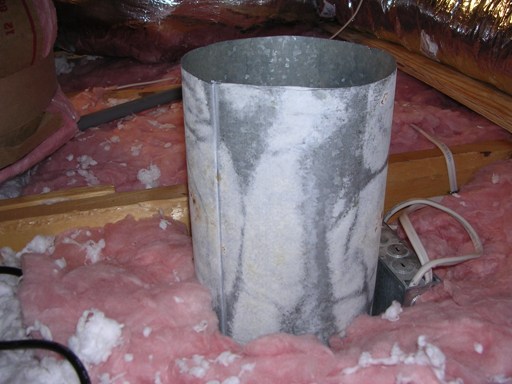
Third, he installed insulation barriers around the recessed lighting
for ventilation. These were made from some old rigid duct he had
laying around.
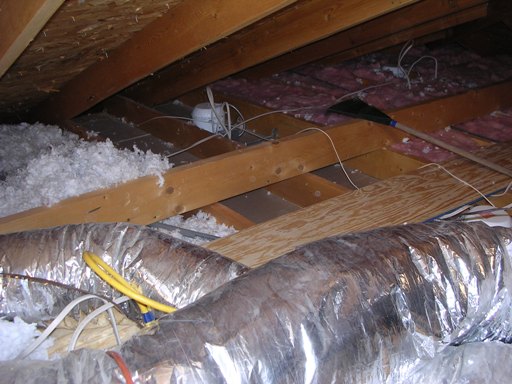
Next he stapled up the reflective foil radiant barrier, moving the
blown-in insulation back as he installed it. He used attic blanket around
the perimeter to keep the blown-in from dropping into the soffits.
This is an optional step and could have been skipped since the
radiant barrier went all the way down to the ceiling joists, but it
did help him get the blown-in insulation to the right depth.
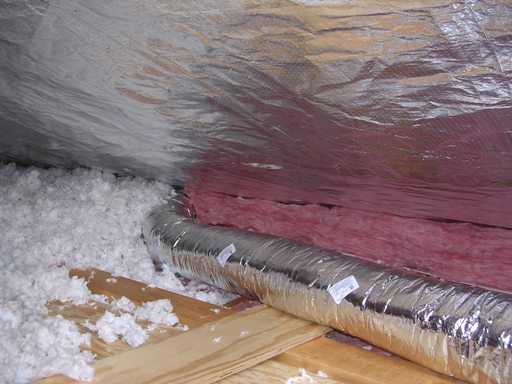
Here is a photo of the finished job for the second floor attic. You
can see the vents for the recessed lighting and duct-work coming up
through the insulation.
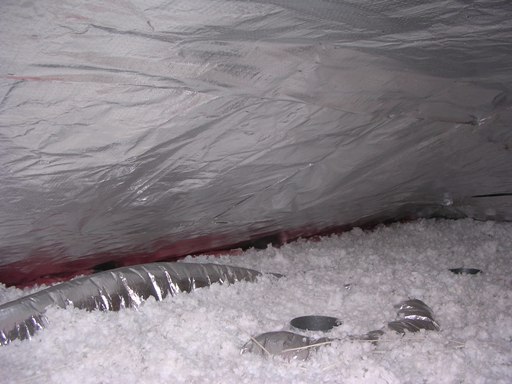
The upper attic is shown above and was nearly 1,000 square feet in size. The attic over
the main floor shown below was nearly 3,000 square feet in size. Since putting in the barrier, the temperature in the main
attic has stayed below 100 degrees Fahrenheit during the hottest parts of August.

The most difficult part of the project was getting the insulation
attached down at the the eves and getting it pulled out straight.
The plywood work platforms helped with working in the "low" areas,
and he made spindle out of a broom handle to hold the roll of
foil. The spindle and roll were attached to the roof rafters using
plumbers strap. This made it easy to pull out long sheets of foil
and staple them up. He used an electric stapler and over 4,000
staples.
Back to the top
Foundation
Repair
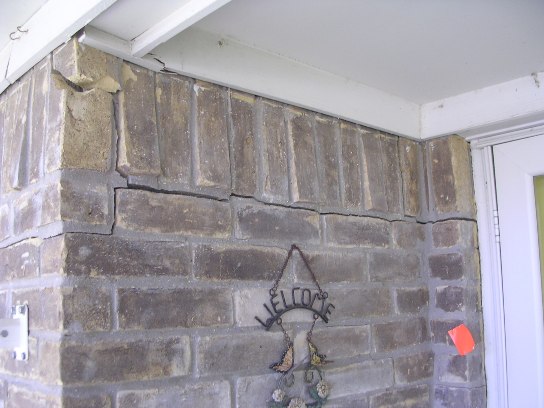
Texas experienced one of the worst droughts in history during the
summer of 2011. The front of the house has settled slightly over the
years, but the extremely dry soil conditions caused as much settling
in 3 months as had occurred in the last 30 years. The amount of
settling became very evident from the cracks in the brick at the
front door.
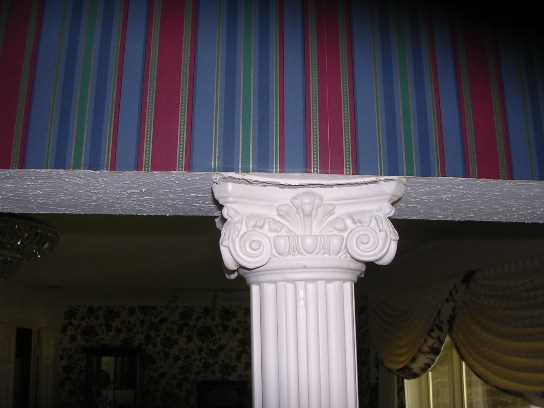
Inside, it was just as bad. Here is a shot of one of the columns in
the foyer.
As result, we had
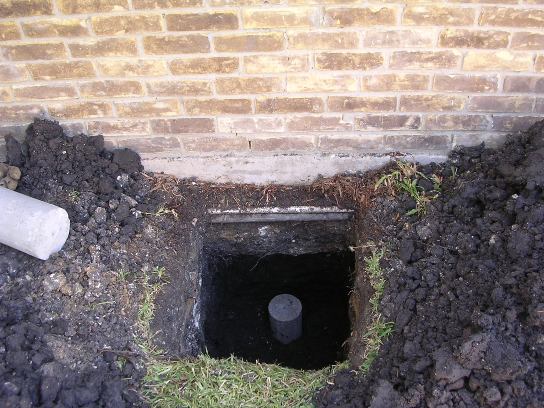
to have the front of the house jacked using concrete press-in piers.
The photo below shows the construction crew digging 13 "access
holes" along the front and sides of the house. The orange tags show
the location of each pier.

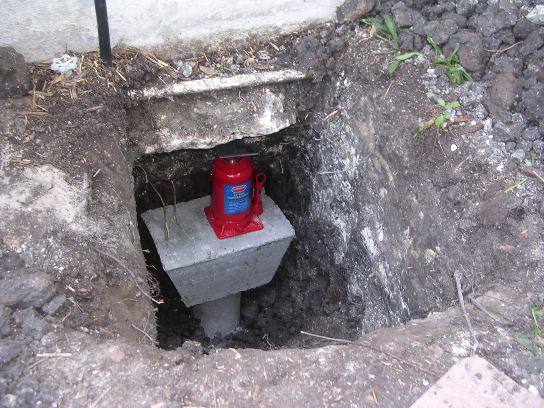
Once the "access holes" were dug, pier sections were pressed down to
bedrock using a hydraulic cylinder and the weight of the house.
Each pier was capped and hydraulic jacks were used to level the
house.
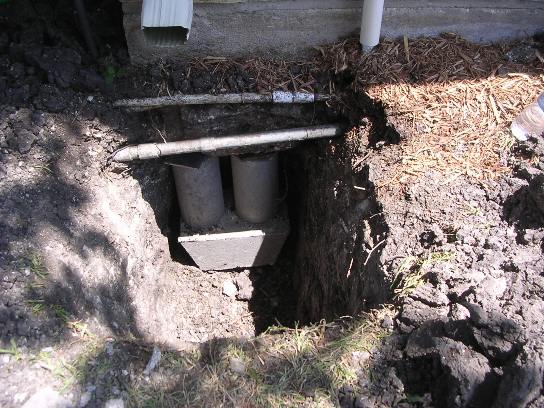
Once the house was leveled, a pair of support cylinders were sized to
fit between the cap and the bottom of the footer for the main slab.
One cylinder was placed next to the jack. A shim plate was placed
between the top of the cylinder and the bottom of the footer. The
jack was then removed and a second cylinder and shims were
installed.
Once the slab was checked for level, the holes were filled and that
part of the job was completed.
The final step was to patch the cracks in the exterior brick veneer.
The entire job was done in one day.
Back to the top
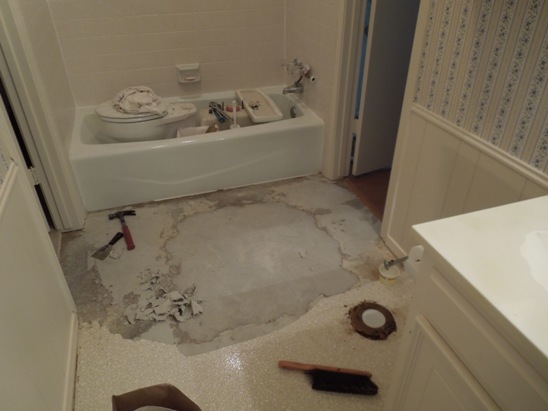
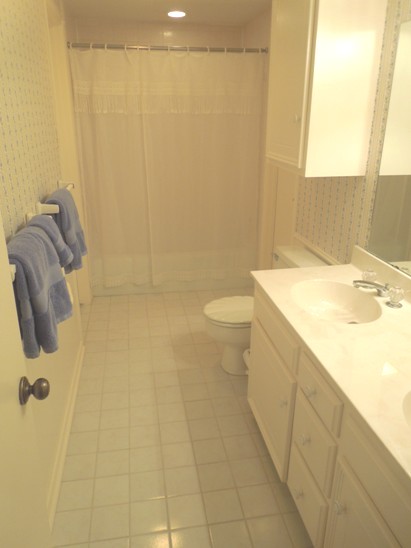
Hall Bath
Renovation
In the Fall of 2011, after the
house was re-leveled, we coincidentally had a leak in a sewer line
under the hall bath in the front of the house. To repair it, they
had to break out a section of floor. The photo below shows the floor
after the repair was made and floor patched.
After removing the remaining vinyl, Bruce set new ceramic tile.
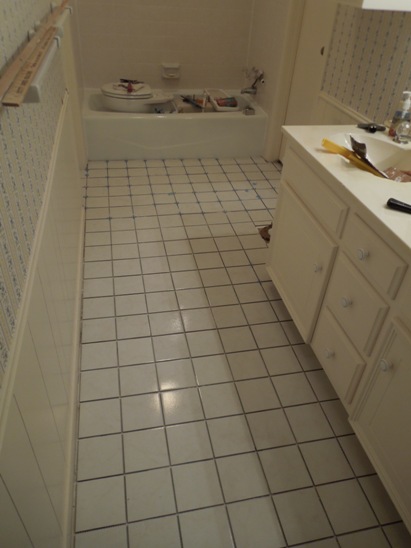
Step three was to grout it.
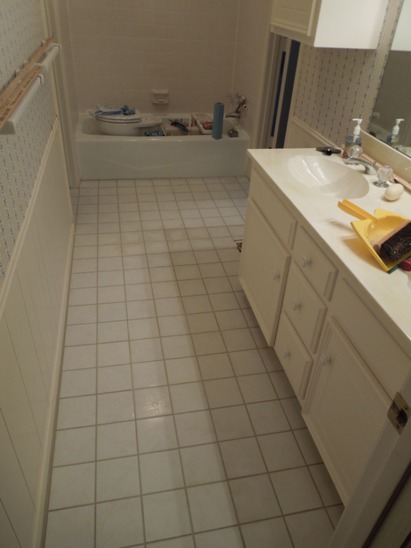
Once properly set, the toilet was reset and bathroom returned to its
original state, except with ceramic tile instead of vinyl floor
covering.
 Back to the top
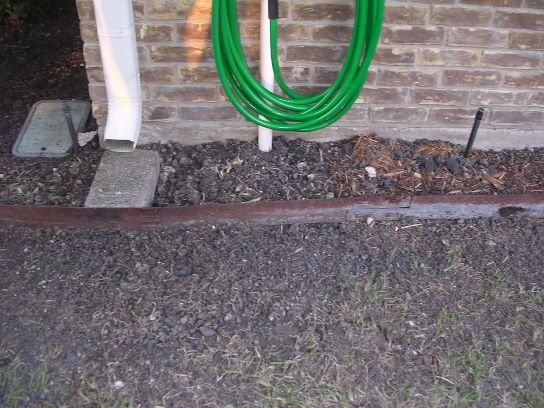
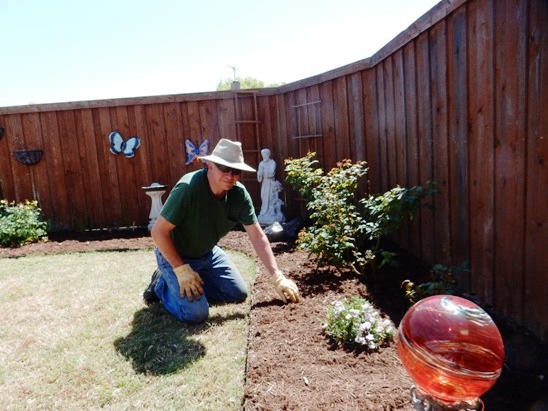
Edging
In March of 2012, Bruce and Betsy replaced the edging
in the yard. The original edging was probably 25 years old and reached the
end of its life. They started in the back, removing the old edging.
Here is a shot of Betsy dismantling the old edging prior to
installing the new.
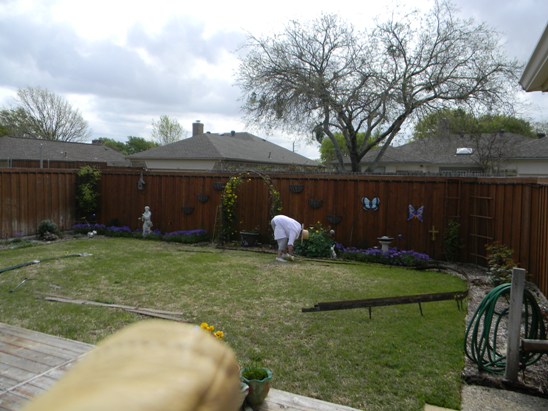
Next, it was time to put the new edging in. The way the old edging
was installed, the width of the beds
varied, so they made all the beds the same width. In the process,
they ended
up having to remove some of the lawn. The photo below shows Betsy
digging out some of the grass.
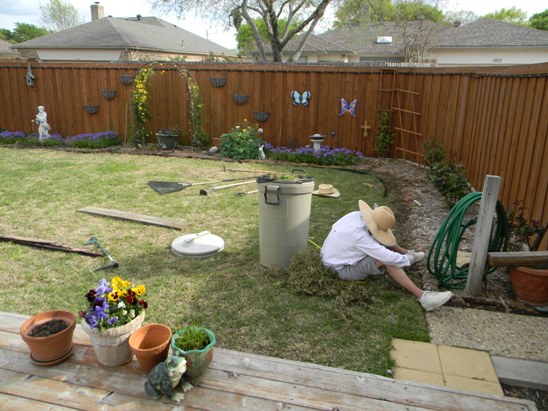
They also replaced the edging in the front yard which is not
pictured.
Back to the top
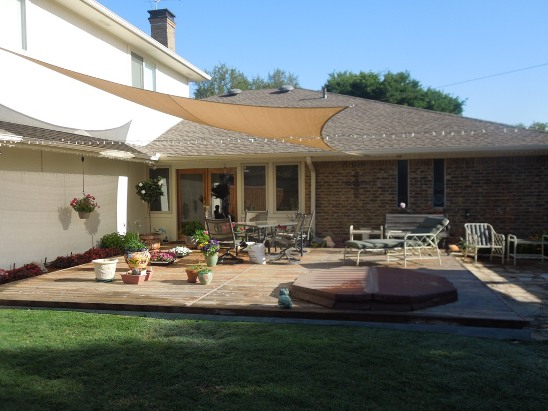
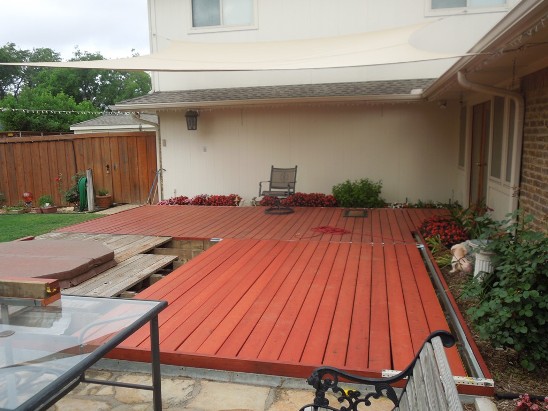
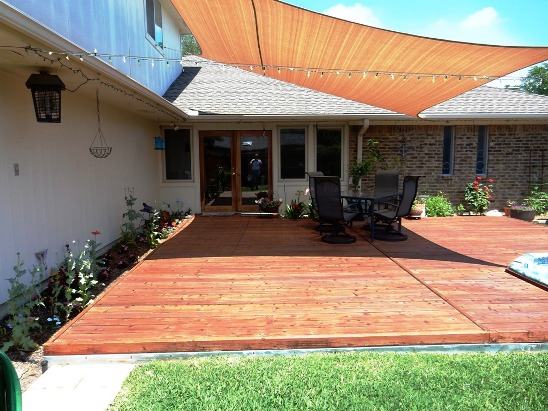
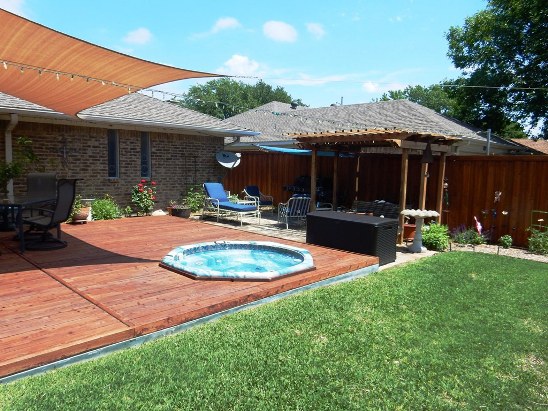
Deck Rebuild 2 The redwood deck had reached its end of life, so in the spring of
2013, it underwent a major restoration. The ends of the planks were
beginning to rot off, making it unsafe. Below is a photo of the way
it looked at the start of the project on May 4th.
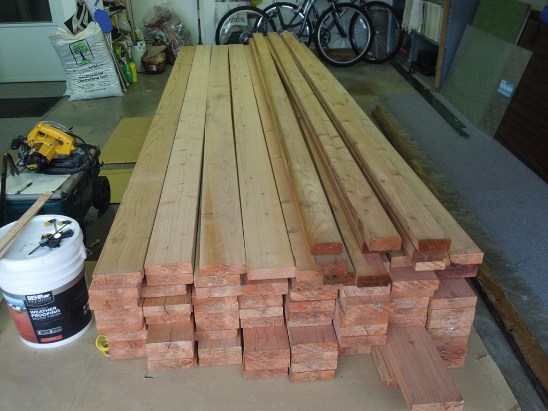
The new planking and trim was in the garage waiting to be cut,
stained and installed. The planks and trim were cut and stained
first to be able to get good coverage on the ends and edges. The 2 x
6s were used for the deck planking and the 2 x 4s for the edging.
 By Sunday, May 5th, one side had been stripped of its planking.
Some of the old planks were laid across the longitudinal supports to
serve as a
walkway.

By May 13th, the structural repairs were made to the left half and
the planking was half complete. Galvanized flashing was added this
time to protect the framing. Last time, dirt and leaves collected in
the crack at end of the planks, rotting the ends and the framing
underneath.
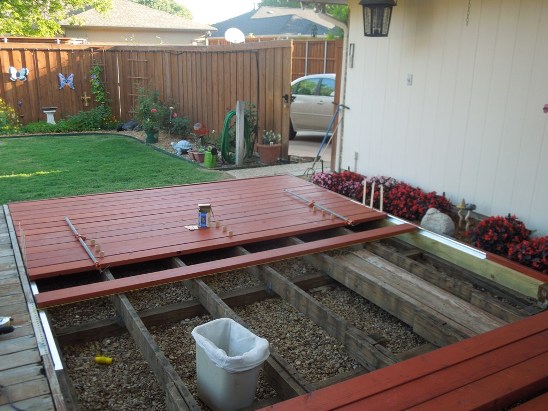
The decking continued on the west side until all but one board was
installed. This board had to be cut to s special width and was saved
to last so I would only have to set my table saw up once.
Next, the east side was
"deconstructed", at least up to the hot tub.
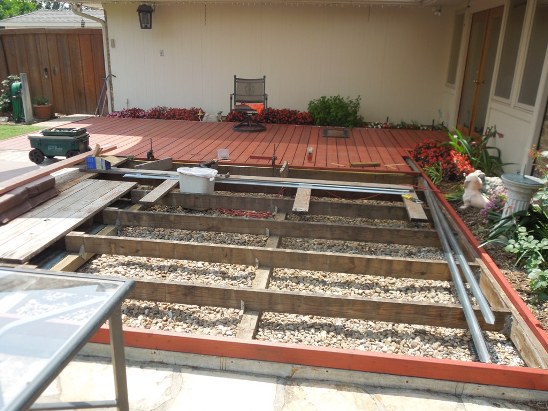
After some minor repair work to the frame, the deck boards were cut,
finished and installed. Below is how it looked at the end of the day
on Sunday, May 19th. The very ends of the deck boards have not been
fastened down at this point and vary in spacing. This is because
the outer edge of the frame still needed adjustment to provide a
uniform space between the end of the boards and the frame. Once the
frame is adjusted, the ends of the boards were spaced and screwed
down.
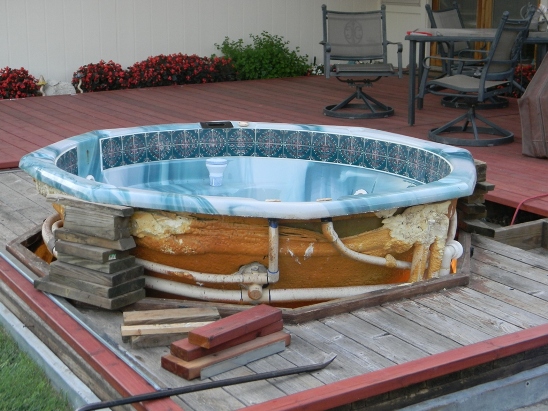
The final step in the restoration project was to raise the hot tub
so the planking under it could be replaced. On June 3, the hot tub was
drained, the controls and plumbing were disconnected, and it was
raised up enough to get access to the bezel and planking under the
lip. Once high enough, it was blocked from underneath and the stacks
of blocks on top were removed.
Once the decking around the hot tub was replaced, it was set back in
and below is a shot of the finished project.
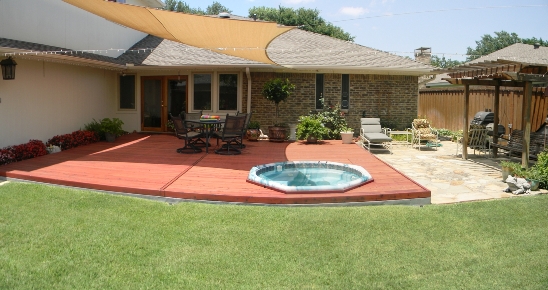
The "official" finish date was June 22nd.
Back to the top
Irrigation System Conversion
In 2013, the area went into Stage 3 water restrictions due to the
continuing drought. These restrictions limited "lawn sprinkling" to
one day per week, but allowed the use of soaker hoses for foundation
protection. Soaker hoses were placed in the beds around the
foundation, and were used for manual watering. Fortunately, Bruce designed the original above-ground
irrigation system with several foundation watering zones. These
zones were converted to "drip" irrigation using the soaker hoses
being used for manual watering. This
was done by removing several spray heads and connecting the soaker
hoses to the original above-ground system using several riser "tee"
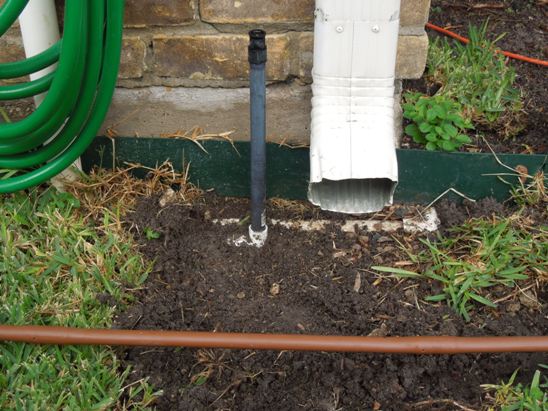
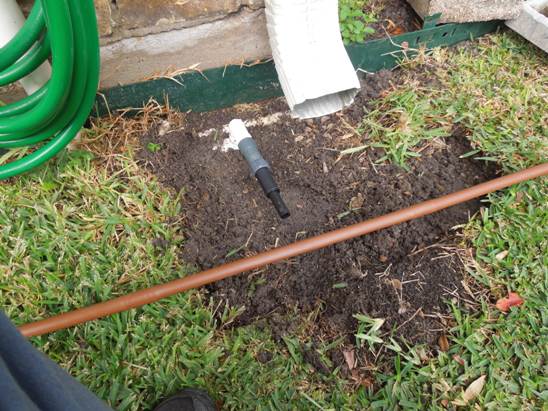
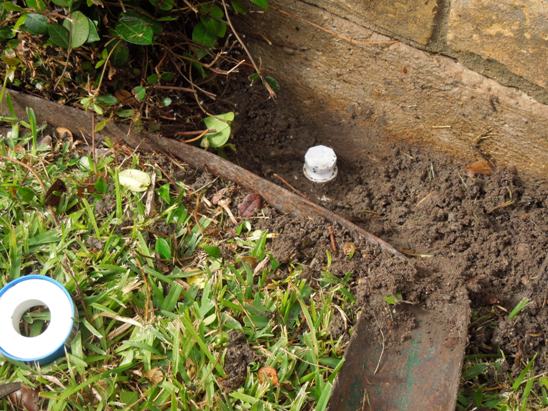
points and cutting off the hose connections. The photo below shows a typical connection at a former riser
location.
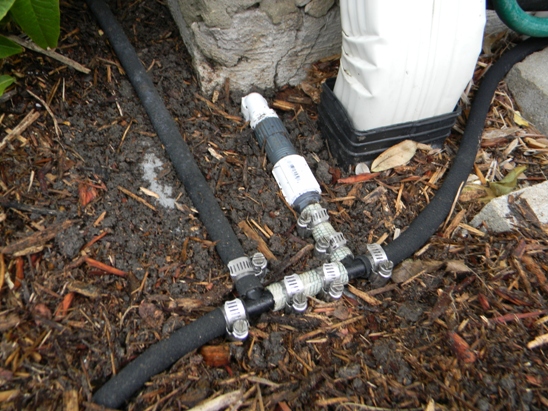
A spray-head riser was removed and a street elbow was used to
connect to the main line next to the foundation. A 25 psi regulator
(gray) was connected to the elbow. The regulator was needed to drop
the line pressure to a value the soaker hoses could handle. The
white coupling was used to transition between the regulator and hose
barb. A short piece of hose was used to connect a tee, and the the
soaker hoses. The mulch was raked back and the soaker hoses were
laid on top of the soil. Once the soaker hoses were in place, the
mulch was raked back over the hoses, hiding them from view and
protecting them from sunlight.
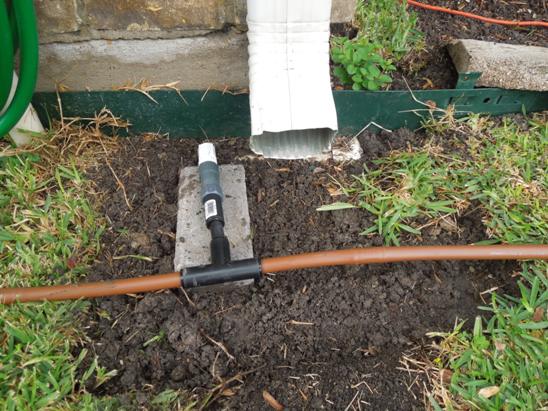
The mulch is raked back in the photo below to show the hoses under
the mulch.
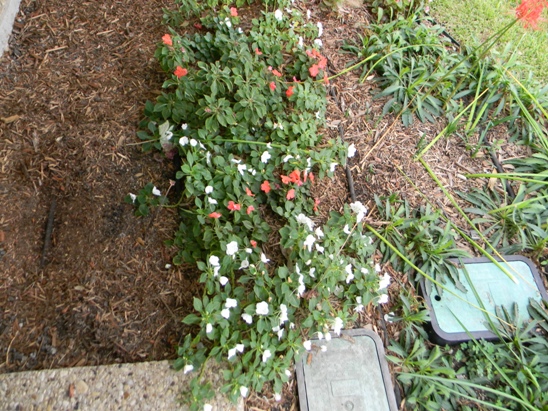
There are four hoses in the bed above. Three of them are obvious.
The fourth hose is just to the left of the flowers in the center of
the photo.
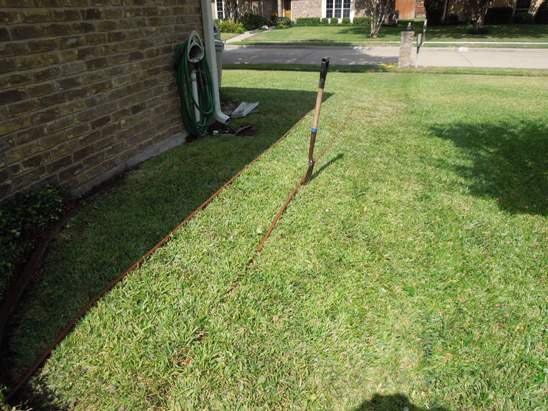
Some of the perimeter zones also included grass. The photos below
show the installation of drip-line in one of the lawn areas.
The photo below shows the first line being placed parallel to the
foundation. The grass was cut with a square-nosed shovel and the
drip line was placed in the cut in the grass at ground level. The
end was initially placed in the ground because the line ran under a
piece of landscape edging into a bed with ground cover, and this was
necessary to determine the length.
The line was run down the side of the house past the point where it
was going to be hooked into the conventional irrigation zone. The
photo below shows the riser that will be used to feed the drip line.
Next, the riser was removed and a street elbow was inserted.
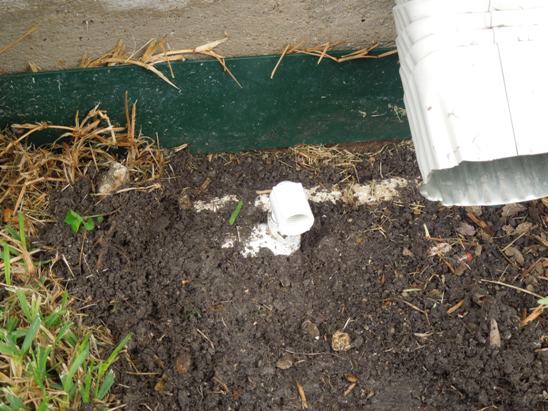
Next the regulator and tubing adapter was installed.
Once the connection point into the drip-line was determined and a
tee was inserted as shown below. The drip-line continued towards the
right to a manifold for additional lines.
Additional drip-line was added and connected to a manifold at
distant end of the side yard. The photo below shows the two
additional lines in place and in the process of being "planted."
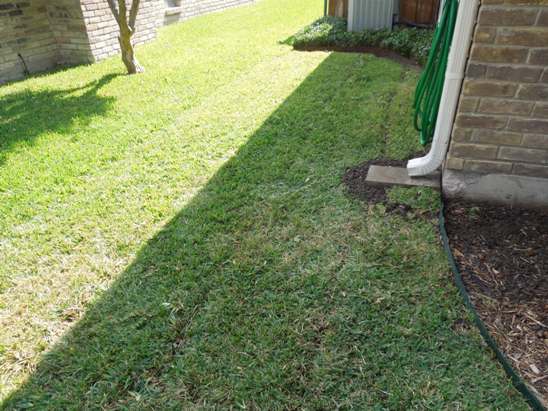
The photo below shows the completed installation.
The photo below shows the drip-line in the grass at the level of the
dirt. This allows the drippers to flow freely while keeping the
drip-line down in the grass for protection from mowing. The photo
was taken right after the grass was cut.
The final step in the process was to plug the remaining risers on
the zone. The photo below shows one of several plugged riser
connections.
Back to the top
Drip System For Planters
In addition to converting the main irrigation system to use soaker
hoses in 2013, a separate drip system for potted plants and hanging
baskets was also installed. This was a single zone controlled by a
separate controller.
Check back later for photos of this installation. Back to the top
Air Conditioning System Replacement
Check back later for photos of this installation.
Back to the top
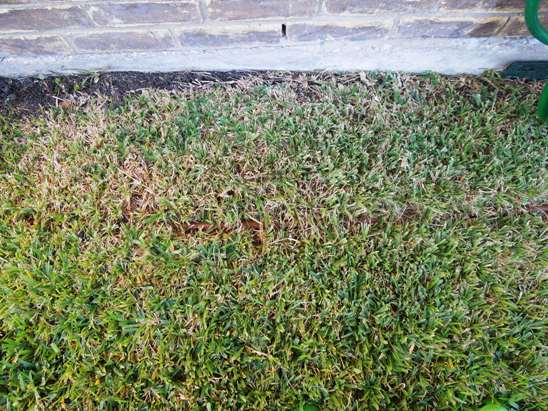
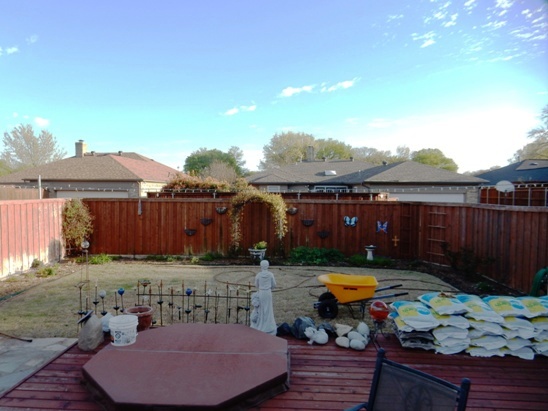
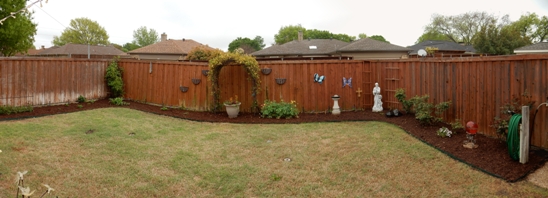
Flower Beds Restoration
The beds at the Blais house were nearly 20 years old and were last rehabilitated in 2012
with new edging. At that time it was apparent that the soil and weed
block were in need of rejuvenation. In the spring of 2015, the work
on bed restoration began with the bed around the back yard.
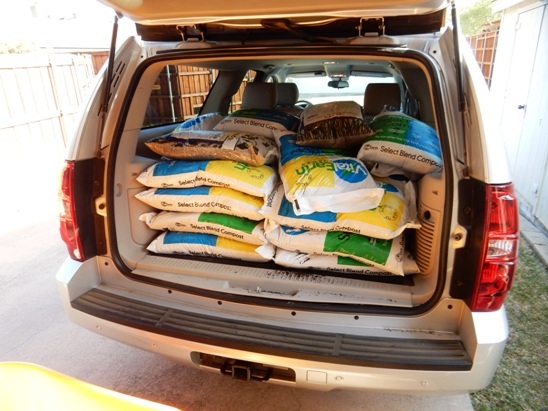
The first step in the project was to determine how much compost,
weed block and mulch would be needed. Bruce has a scaled drawing of
the property, so determining the area of the bed was easy. He
figured 1" of additional compost could be added without having to
remove any of the existing soil in the rear beds, and this
calculated out to be just over a cubic yard. Below is a photo of
just over a cubic yard of compost in the Suburban.
Below is a photo of showing the beds around the back yard
at the start of the project.
The first step was to remove the yard art, drip lines, mulch and what was left
of the weed block. Weed block has a 10 year life, and the stuff that
was in the beds had reached the end of its life. Many of the smaller
flowers were removed, but the larger and more delicate ones were
left in the ground.
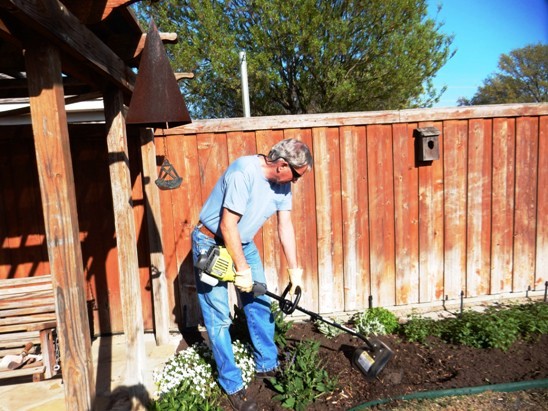
Next organic compost was laid on to a depth of 1" and tilled in.
Many of the smaller flowers were temporarily removed to facilitate
tilling.
After tilling, the soil was leveled, new weed block fabric was laid down
and the drip lines were repositioned. Openings were cut into the
weed block for the larger flowers as the weed block was installed.
At this time, the smaller flowers were re-planted, and they also
took this opportunity to rearrange some of the plant groupings in
the garden.
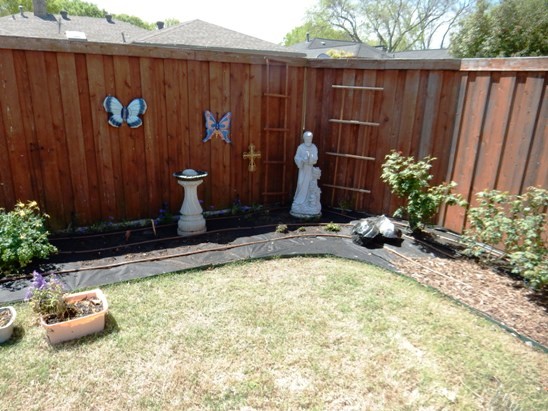
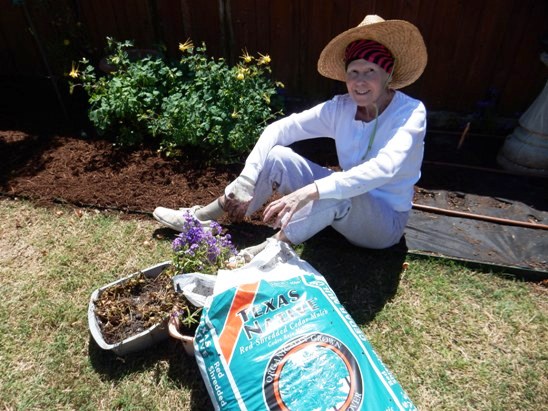
With the plants and yard art re-installed, it was time to add new
cedar mulch. Betsy and Bruce prefer to use cedar mulch because cedar
is a natural insect repellant. Below is Betsy placing mulch around
the Columbine.
Below is Bruce putting the finishing touches on spreading the mulch.
It looked good when it was all done.
The photo below was taken after a good, soaking rain the night after
they finished the project.
 Back to the top
Drip
Irrigation Rework Back to the top
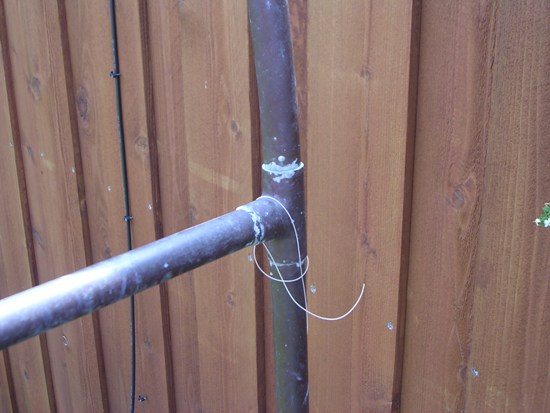
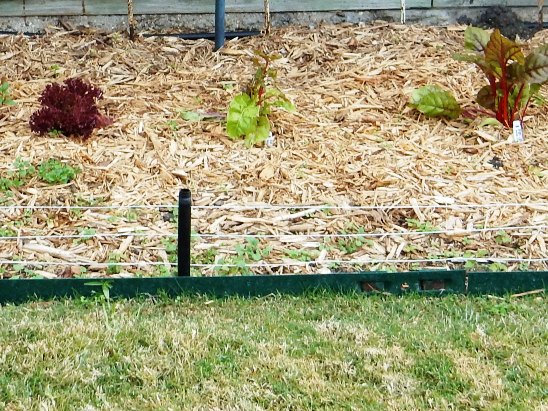
Electric Garden Fence
In the fall of 2016, Betsy decided to convert part of her flower
beds to a vegetable garden. The only problem was going to be keeping
the varmints from dining on her delicacies. Being an electrical
engineer, Bruce figured an electric border would likely keep them
out, so he made a low fence using old sprinkler risers, and electric
fence charger and some wire.
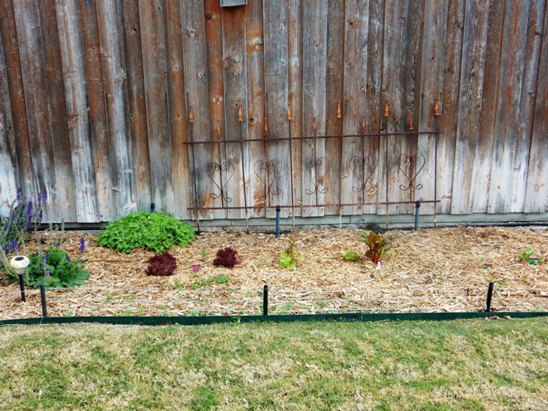
It is a bit difficult to see in the photo above, but there are three
wires, two inches apart running through small holes drilled in the
risers.
The photo below provides a better view of the wires.
To keep the varmints from coming over the wood fence, he installed
both a hot and ground wire on top of the fence.
The hot wire is on the the insulators and the ground is run along
the top of the fence under the insulators. Back to the top
New Sink Faucet & Reverse Osmosis
Filter
Bruce had been suggesting they install a reverse osmosis filter at
the sink as an alternative to buying bottled water in bulk. In May,
2017, they finally did it. Bruce researched the various models
available and settled on the Krystal Pure KR10. It did a good job on
filtering and had the lowest recurring cost for the replacement
filters and membrane.
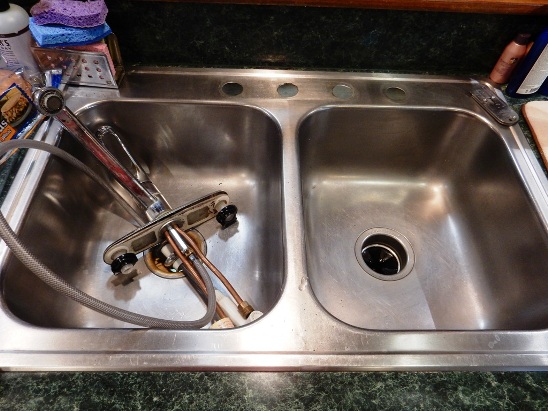
The first thing to do was to replace the existing sink faucet. He
did this so they could have one with a pull-down sprayer and free up
the hole in the sink used by the hand sprayer. The photo below shows
the old faucet removed and the back of the sink being cleaned prior
to installing the new one.
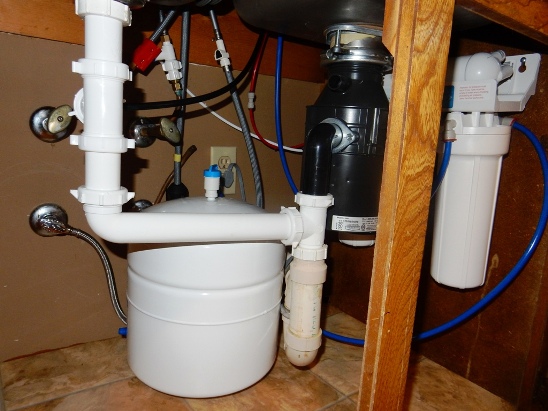
Next, came the under-sink work associated with installing the new
faucet and filter. At this point the faucet is installed and the RO
filter is next.

The photo below shows the final under-sink installation.
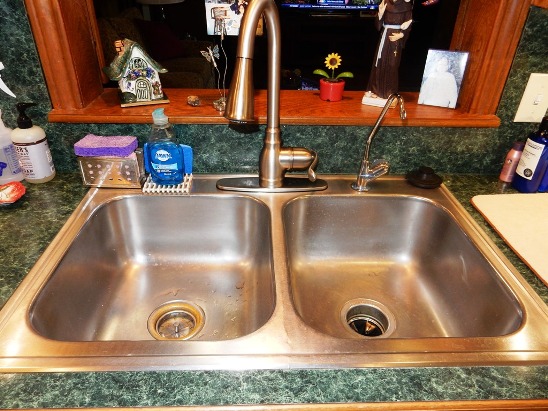
The photo below shows the finished project with the filtered water
faucet installed on the right side.
Back to the top
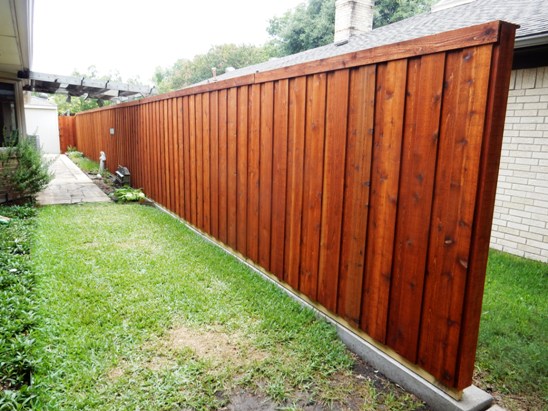
Fence
& Deck Restoration John Markham, one
of Bruce's mountain biking friends, owns a wood restoration company,
so when the time came to refinish the fence and deck, John got the
call.
The first step was to wash it with
bleach to remove the old stain.
Next, the new stain was applied. John recommended an oil-based stain
which Bruce felt was the best product for the application.
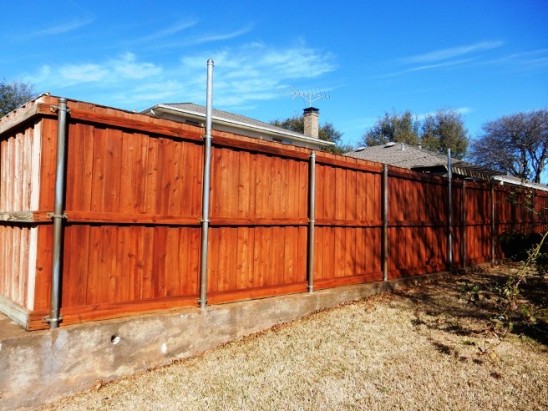
The finished deck, west end.
The finished deck, the east end.
Back to the top
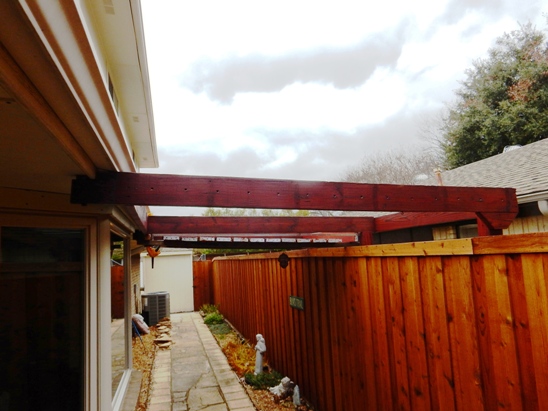
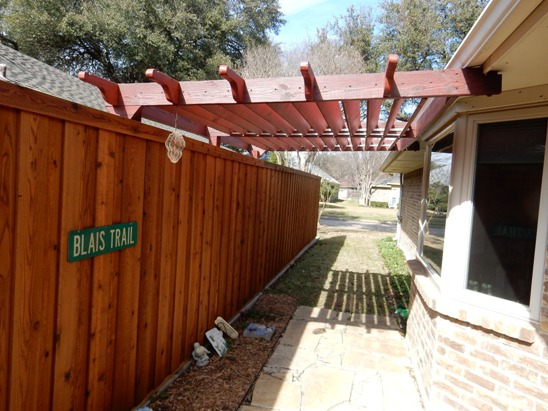
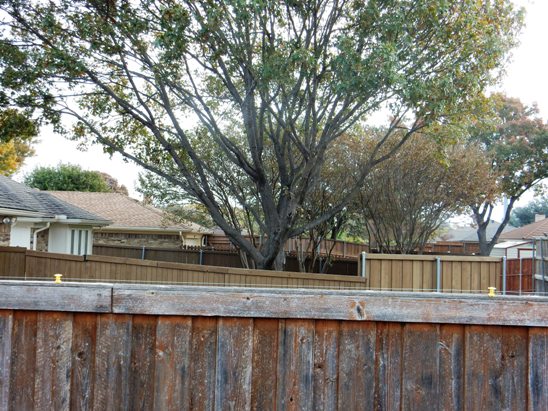
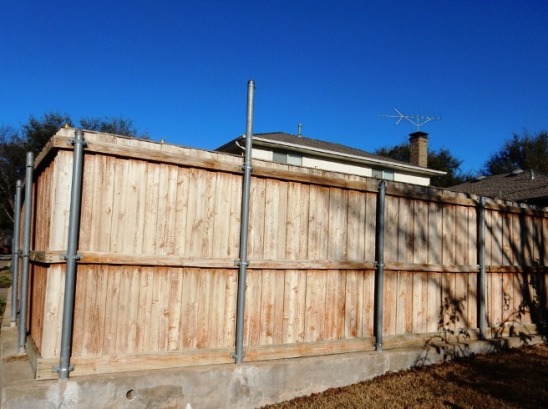
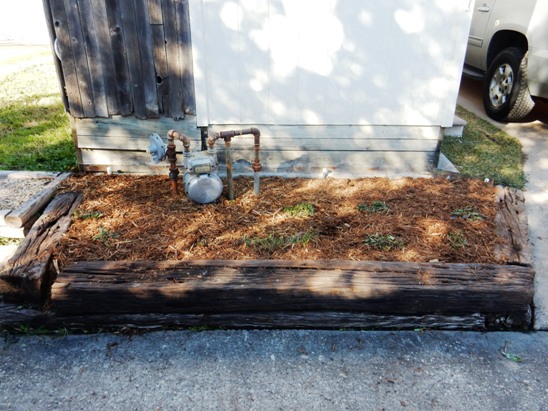
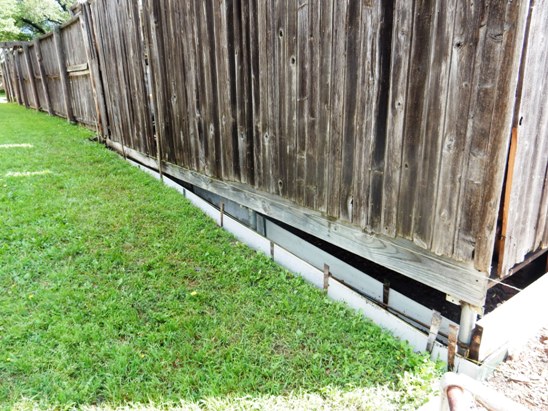
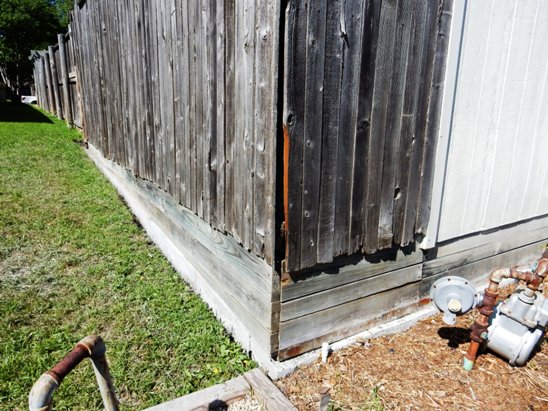
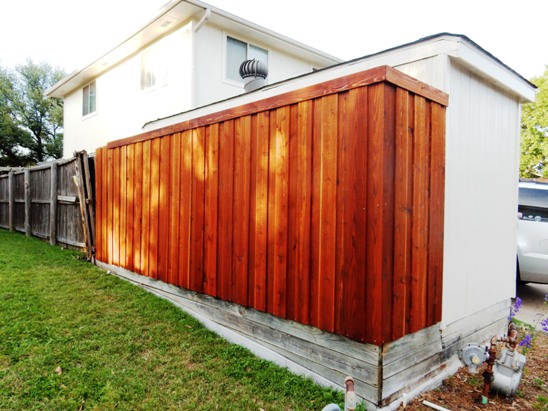
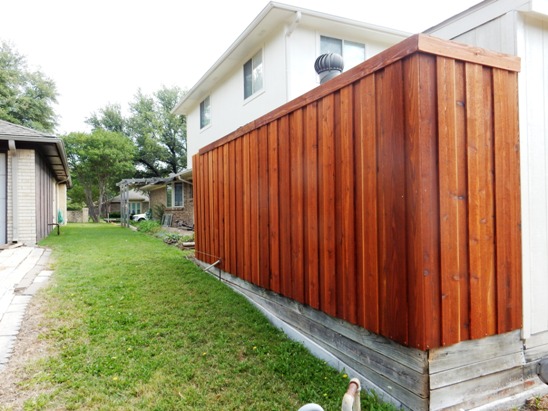
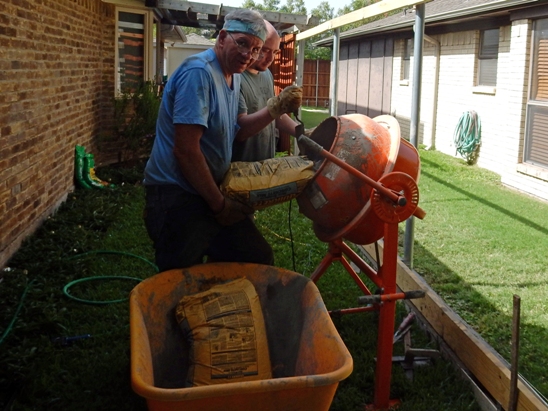
West Fence Rebuild
We got about as much life out of the fence out of the fence on the
west side of the house. The replacement began with pouring a
concrete curbing under the fence.
The first step was to place a concrete curb under the end skirt on
the shed to keep critters from trying to live under it.
Next, the area under the old fence for the storage area behind the
shed was excavated and formed.
The photo below shows the storage area with the decking remove.
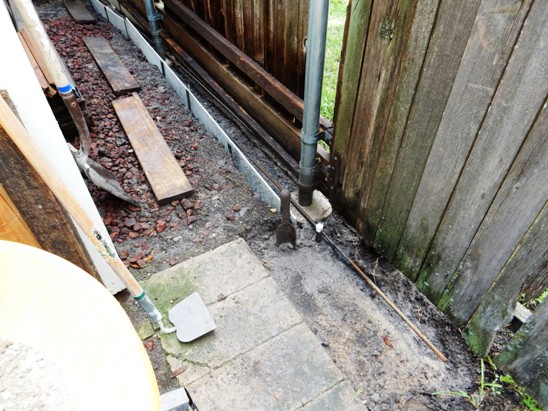
Once the concrete curbing was completed under the fence for the
storage area, the skirting was replace.
The old fence boards and stringers were removed and new ones went
up.
The remaining 75' fence was removed and the posts extracted. Bruce
used a tripod made of 8' landscape timbers and used a 4,000 pound
ratchet hoist to yank them out, concrete base and all.
Next, the new galvanized steel posts were set in concrete.

Bruce used the top and bottom stringers to keep the posts in
position while the concrete was poured. This was a two-step process.
The posts were set and he excavated and formed up the curbing.
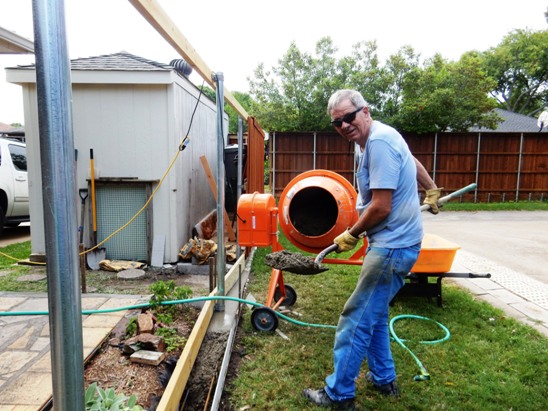
The final stages of pouring the curbing.
Once the concrete had set, the stringers were finished and the fence
boards were installed.
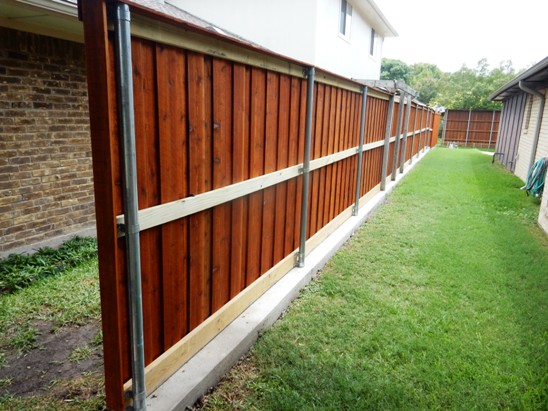
Bruce drilled and prefinished the boards and fastened them with 2"
deck screws. This is a board-on-board design without any cracks
visible between the board. Total length was 96 feet.
The concrete curbing provides a nice barrier with the neighbor's
yard and keeps his Bermuda grass out of Betsy's flower beds.
Back to the top
Driveway Widening
Betsy was very nervous backing out of the driveway when the Suburban
was parked back there. Since Bruce had the concrete mixer, he
decided to widen the driveway by 2' to give her some extra room.
The photo below shows the stabilizing sand going into the excavated
area.
Next, #3 rebar on 11' spacing was installed and the concrete was
poured.
Back to the top
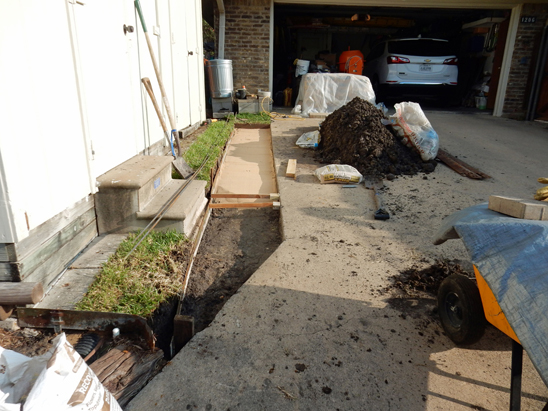
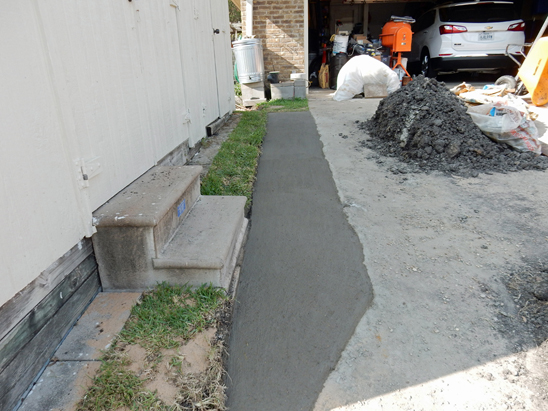
Shed Patio
There was a small area at the end of the sidewalk on the west side
of the house and the shed that was difficult to maintain. Since he
had the concrete mixer, he decided to pave it over with Oklahoma
Native stone.
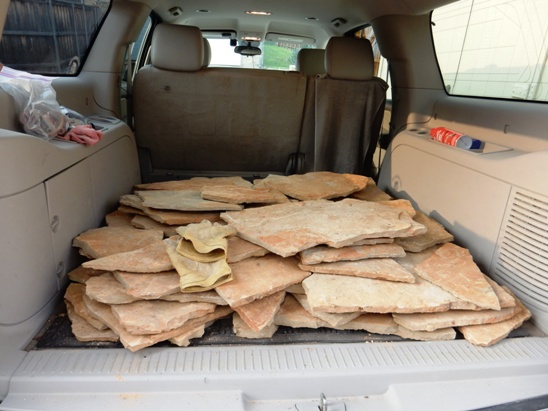
Bruce made a design and materials
list. Below is a load of stone that would be used to finish the
area.
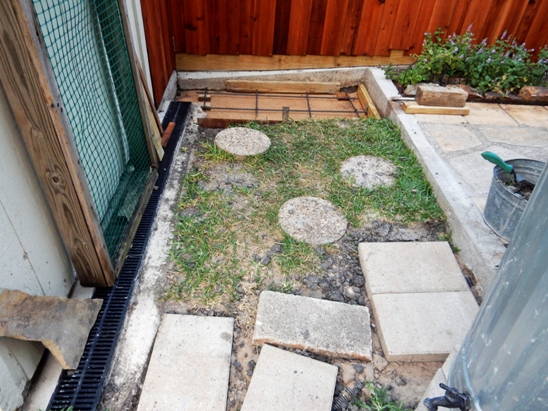
Since there was a 3' easement along
the property line, Bruce built the patio in two phases. The section
next to the fence can be removed if ever needed. He also installed a
channel drain up next to the shed to drain the water away from the
shed.
First, the 3' section over the easement next to the fence was
poured.
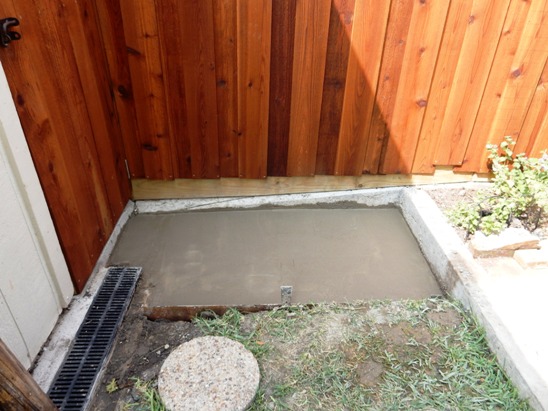
Next the section by the shed was excavated and prepared. This also
included extending the 4" drain line for the gutters, the main
irrigation line and drip irrigation line. The drain line for the
gutters connected to the channel drain and were extended to the
alley in the rear.
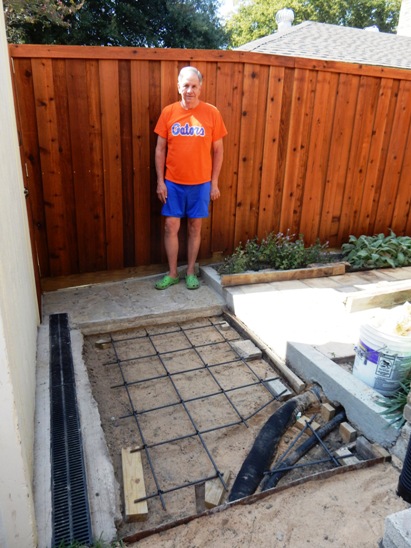
The photo below shows the second section pour.
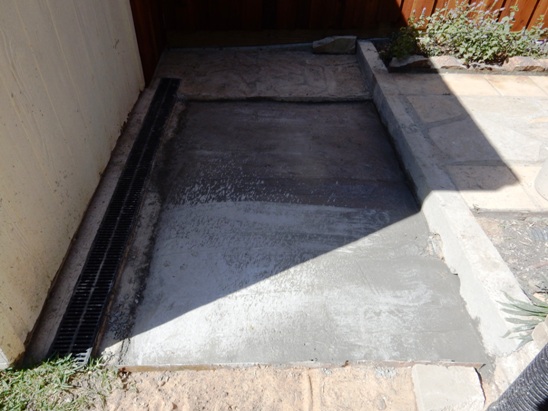
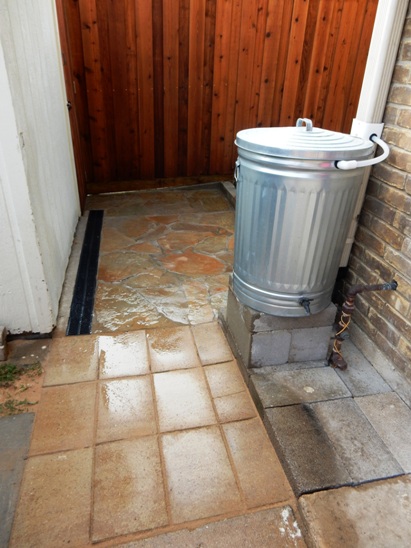
Finally, the stone was set and the rain barrel was reinstalled.
Pavers were used for part of the area since the natural gas line
comes through that area.
Back to the top
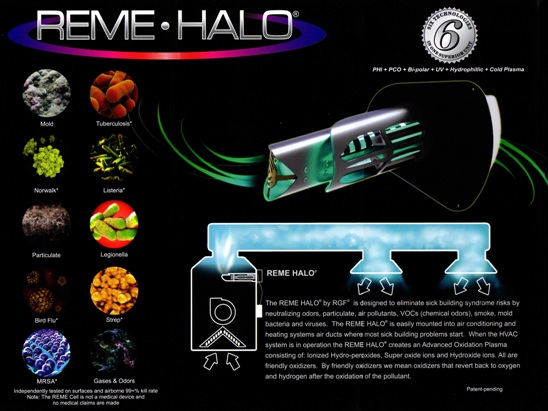
Air Purifier
Bruce and Betsy had been using a free-standing UV air purifier for
years, and when it came time to replace it, they opted for one
installed in the air-conditioning system. After some research, Bruce
decided on the REME*HALO by RGF Environmental. It uses a combination
of PHI, PCO, Bipolar Ions, UV, Hydrophilic and cold plasma to purify
the air. The brochure is shown below.
The sanitizing element installed in the distribution plenum at the
output of the air handler and is wired into the blower. This turns
the unit on whenever the blower is operating.
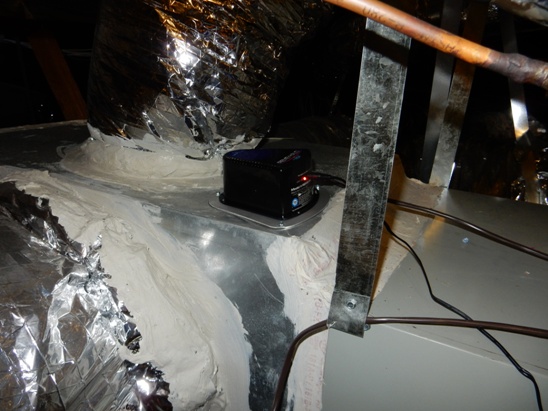
Below is a close up of the REME cell.
Back to the top
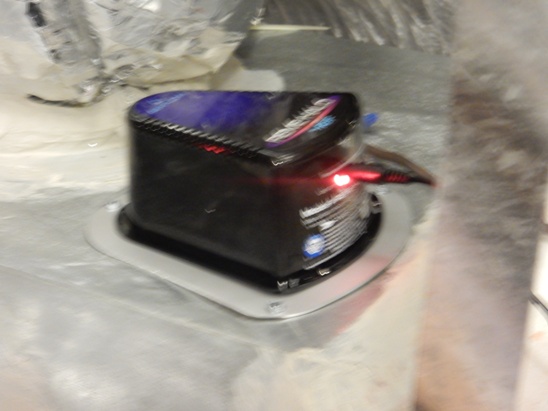
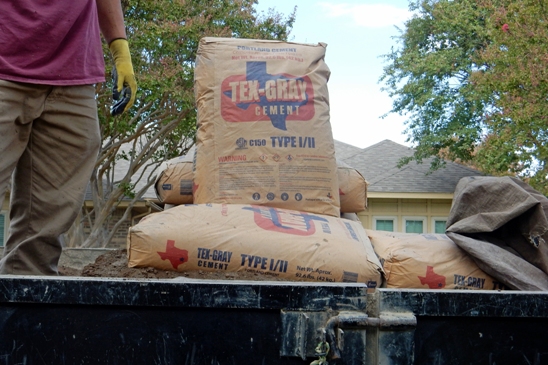
Foundation Repair 2022 Over the
years, they had to have the foundation leveled due to the expansive
clay soil in the area. The perimeter was done with piers, but when
the center started sagging, mud-jacking was done to fix that.
The first step was to find
locations in the sagging area to drill holes to pump in the cement
grout. In our case, it was in several closets and rooms where we
could pull back the carpet.
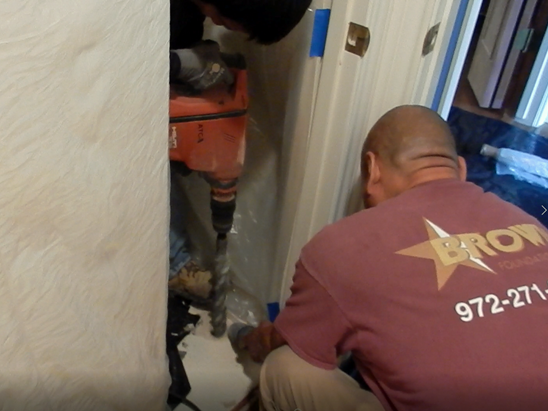
With the holes drilled, it was time to run the high pressure hoses
fire up the pump.
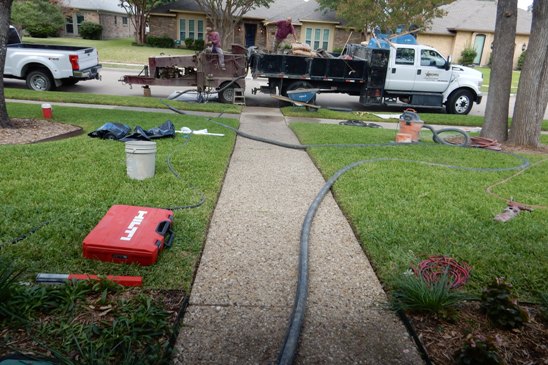
Pure cement was use to raise the foundation.
Next, the feed was inserted into the holes and the cement grout was
pumped in under pressure until the slab was lifted. The worker below
is sitting on the feed to make sure it didn't pop out.
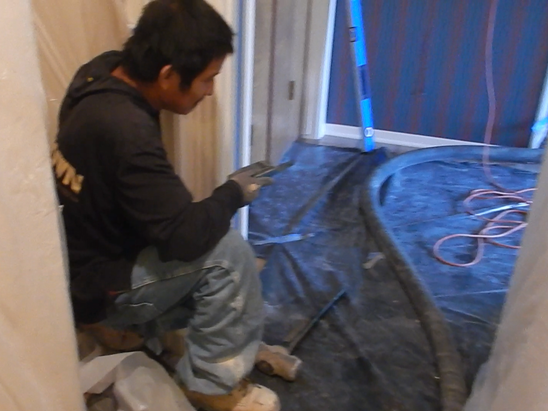
The entire process took about 6 hours from start to finsh and got
the slab to with 0.1" of level over the sagging area.
Back to the top
|